In this post about the very basics of Microsoft Azure, I'll show how to provision and use an SQL Server and database in the cloud. Which is just like a regular SQL Server, except it's in the cloud.
I'll assume you've already got an Azure account and an appropriate subscription to work with.
Creating an SQL Server
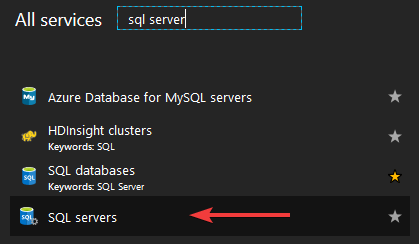
The first step involves creating the SQL Server that your database will be running on. To get started, open the SQL Servers service (try saying that three times fast):
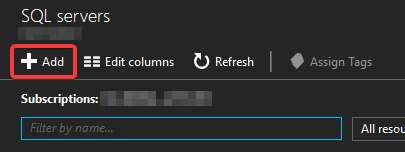
From there, click "add" to start creating the new server:
The blade for creating a new SQL Server will open:

There's some basic information to enter, but overall not much thinky-thinky is needed to complete this particular step. Some things to note:
- The server will receive a public address. This does not imply anyone can just connect to it. We'll talk about connecting in a second.
- The admin login you create here is not your usual sa account (in fact, you can't even enter "sa" here), but rather a separate account with similar privileges. The account is not a traditional sysadmin, and has limited privileges on the master database. For more details, check here.
Once you're all set, click "create" to create the new server. It'll take a minute, and Azure will notify you when it's done.
Connecting to an SQL Server
SQL Servers in Azure are protected by a whitelist-based firewall, which blocks access from all IP addresses except those entered as exceptions. To manage the firewall, open the "Firewalls and virtual networks" blade for your SQL Server:
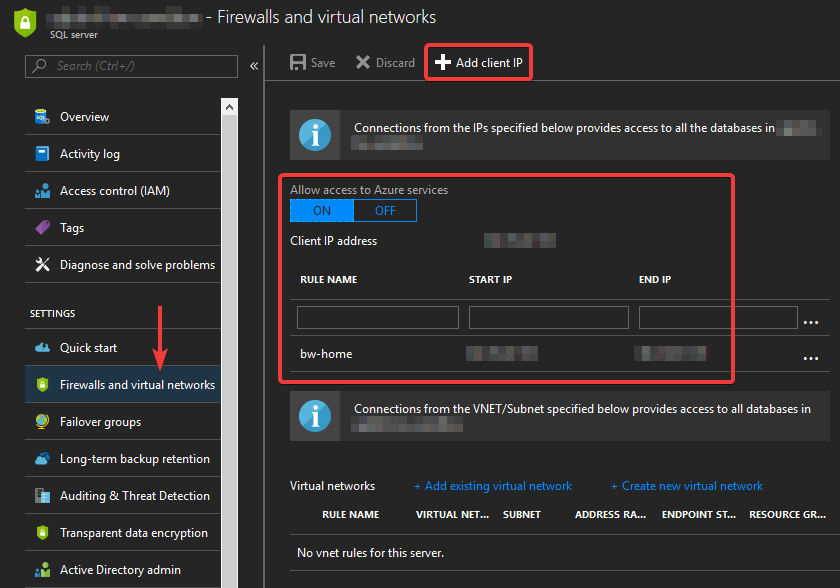
By default, other Azure services are allowed access by the firewall. This does not mean they have access to your server (they still need a valid set of credentials for that), but it merely means that the firewall does not block the connection outright. You can choose to block even these connections, and work purely based on the whitelist, but doing so means any Azure services that need to connect to your database will need to have a known IP address that has been whitelisted.
Connecting from your development environment won't be possible until your IP address has been whitelisted. The firewall blade offers a convenient "add client IP" button for this, which simply adds the IP address of your current browser session to the whitelist, saving you the hassle of having to look it up and enter it manually.
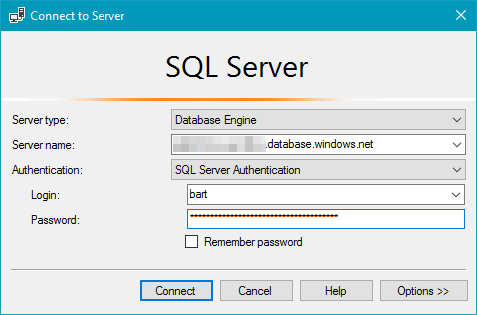
Once your client IP has been whitelisted, connecting to the SQL Server works as usual. For example, you can connect using SQL Server Management Studio:
Once you do that, you'll quickly notice that these Azure SQL Servers are a bit different. Mostly in the sense that you can't do certain things though the UI that you can for traditional SQL Servers. For example, there's no support (yet?) for managing users, so creating new logins and assigning them roles will have to be done though SQL scripting.
Otherwise, as far as my development work so far has been concerned, it's just another SQL Server.
Creating a database
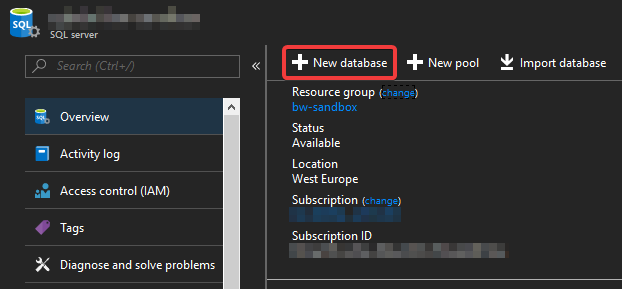
Now that we have our server up and running, it's time to create a database. It is possible to do this though SSMS, but we'll just use the Azure portal for now. In the overview blade of your SQL Server, you'll see a list of databases. From here, you can choose to add one, by clicking on the "new database" button:
The blade for creating a new SQL database will open:
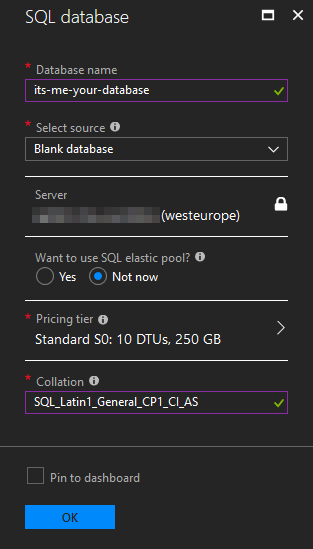
You can enter the usual database-like options, as well as select a pricing tier. I won't go into Azure pricing in these posts, but you should always be careful what pricing tier you're selecting when creating a new resource. In this case, the "Standard S0" tier that is selected by default will run me about €12,65 per month, but the 10 DTUs and 250GB of space is complete overkill for my small development projects. I can easily work with the "Basic" tier, which is only €4,21 per month.
Once you're all set, click "OK" to create the new database, and wait until Azure tells you it's ready.
Connecting to a database
This is probably the easiest part in an already easy process. Once your database is created, you can open its "Connection strings" blade to retrieve the ADO.NET connection string:
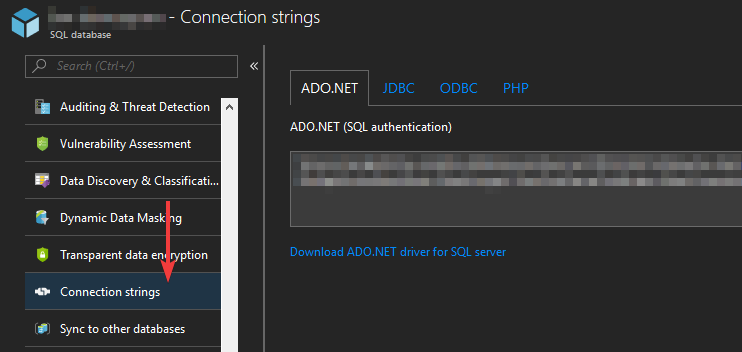
This just works like any other connection string. Put it in your app's configuration and go. From this point on, there's not much difference with an on-premise instance of SQL Server. You can use all the data access libraries that you're used to, such as Entity Framework or Blazer. Only this time, you're connecting to the cloud...