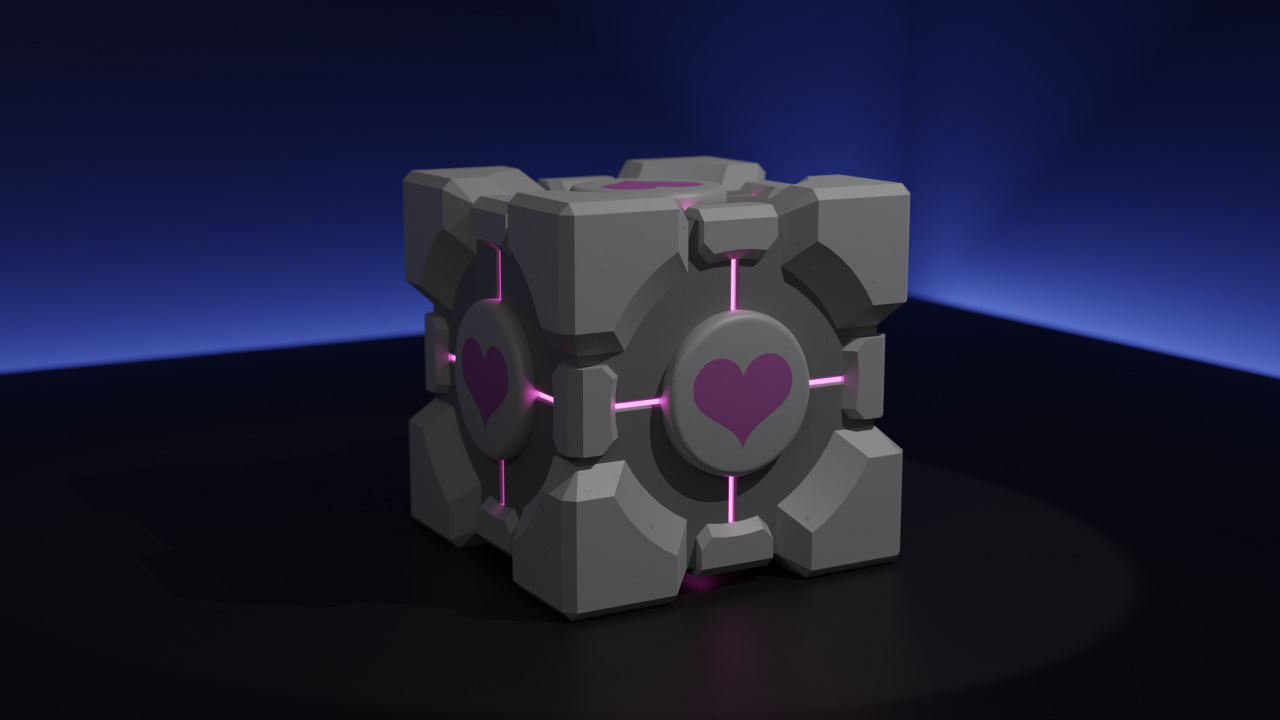
The Vital Apparatus Vent will deliver a Weighted Companion Cube in three, two, one...
I've been learning Blender recently, and after following along with some courses I wanted to try and make something on my own. What better first project than an iconic object from one of my favorite video games? Plus, it's just a cube, so how hard could it possibly be?
Well, not all that hard, really. This was a fun project. There were some challenges, but it was a good exercise of my still limited Blender skills. In the rest of this post I'll go over some of the more interesting stuff involved in creating the cube, but this won't be a tutorial.
As a reference, this is the Companion Cube game model from Portal 1:
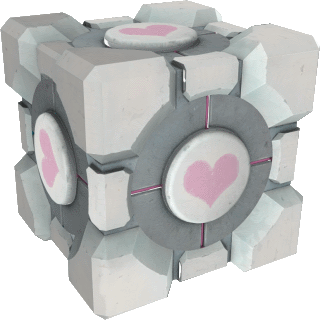
My cube isn't a 1:1 recreation of this (nor was it meant to be), but is simply my own interpretation of this design. The most noticeable deviations I took are the less bulky corner pieces, as well as more saturated colors.
The corner piece
Before starting, I figured the corner piece would prove the biggest modelling challenge. Looking back, it's actually pretty easy, but of course everything is easy once you know how to do it...
Anyway.
For the corner piece, I started with a larger "outer" cube over the smaller "inner" cube. I then loop cut this outer cube down the middle three times, so that each side consists of four identical faces. I then removed all faces except for one corner, to end up with something like this:

From there, a cylinder was used with a boolean operator to carve out the curve, and the three corner edges were beveled using the bevel edge operator. To give it its volume, I created a temporary face on all vertices along the open backside, and then extruded this inward towards origin. The whole thing is eventually mirrored along all axis to give the cube its 8 corner pieces.
The light strips
The most difficult modelling part for me where the light strips. They're basically small trenches that run along the face of the inner cube. The geometry is actually fairly simple, I just feel like I created it in a clumsy way. I started off trying to use two loopcuts to create each trench, but I couldn't figure out a way to ensure that each one was exactly centered, exactly the same size, as well as in exactly the same place as the others.
I ended up using a similar strategy as with the corner pieces. I created one corner of the inner cube, making sure to leave room towards the center for the trench. I then mirrored it along all axis to end up with 8 smaller cubes, like this:
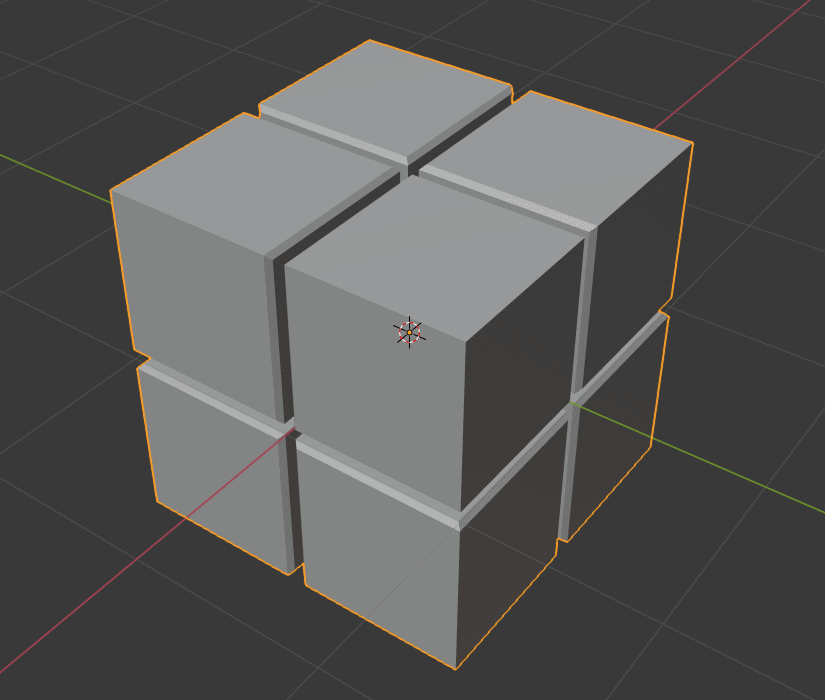
I then manually (yes) connected all of the separated pieces together by creating a face in each trench. The actual light is created by a simple pink emission shader that is applied to the trench faces. Speaking of shaders...
Materials
The biggest overall challenge for me in this build was creating the materials for the cube. I don't have a lot of experience in this area yet, and I feel well out of my depth working with the shader node editor. So, I started off with a simple material setup that is little more than a uniform color using the Principled BSDF.
The problem is, this looks too clean. I wanted the cube to feel like a real object, that has been tossed around a test chamber or two. I didn't really know where to start with creating such a look, but by cobbling together a few tutorials and my own flawed experiments, I ended up with a texture that looks like this:
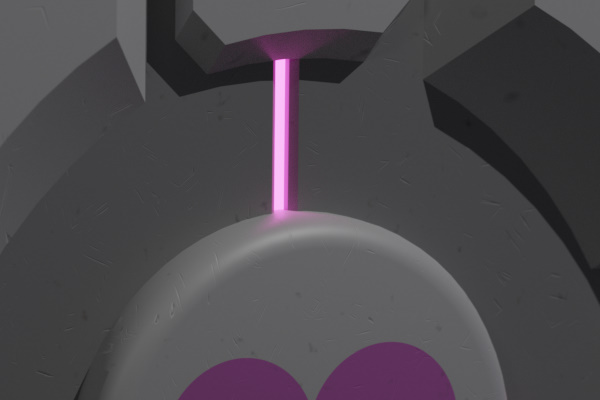
This is a crop from the final 4K render. If you look closely, you can see numerous scratches and smudges on the cube surface. This is all procedural, randomized noise. It's a subtle effect, but it goes a long way in making the cube feel like a real object.
Textures
There is only one texture used on the cube: the heart. This was the last part of the cube I created, and I was able to use some of my new shader skills for it to come up with what I feel is a pretty clean solution.
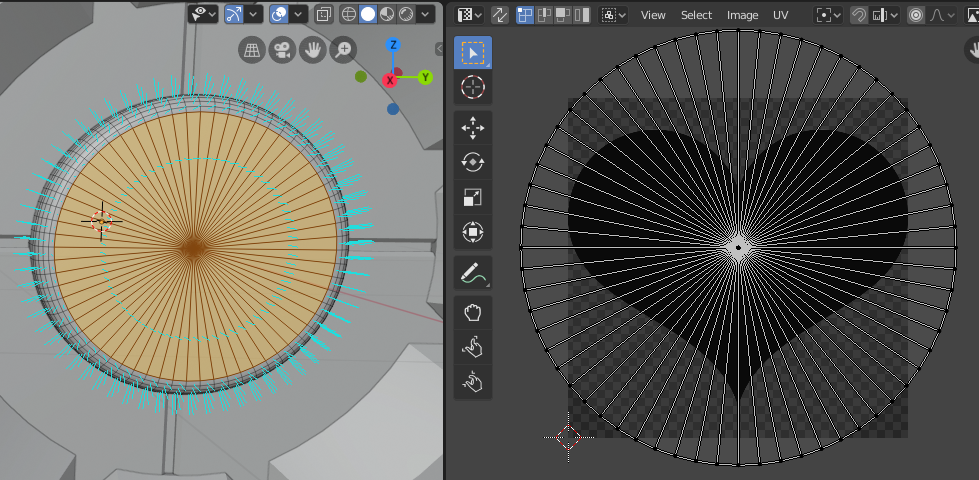
I created the heart as a vector graphic in Inkscape, so that I could export it as large as I would need without loosing fidelity. I ended up using 1000x1000. The image is then UV-mapped to the cube face:
Note that the actual heart texture is black, like my own. This is because while messing around with shaders for my materials, I learned about color mixing, and I figured I could apply it here. So this is how the heart is painted:
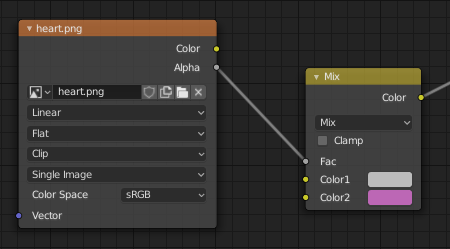
The heart texture is either black, or transparent. Plugging its alpha into the factor of the mix shader means we either get 100% of color 1, or 100% of color 2. Then we can just set these two colors to the cube base color and the heart color, and we're set. The obvious advantage is that we don't have to go back and edit our texture if we want the heart to have a different color; we can just edit the shader.
Setting the scene
Here's the final scene in Blender:
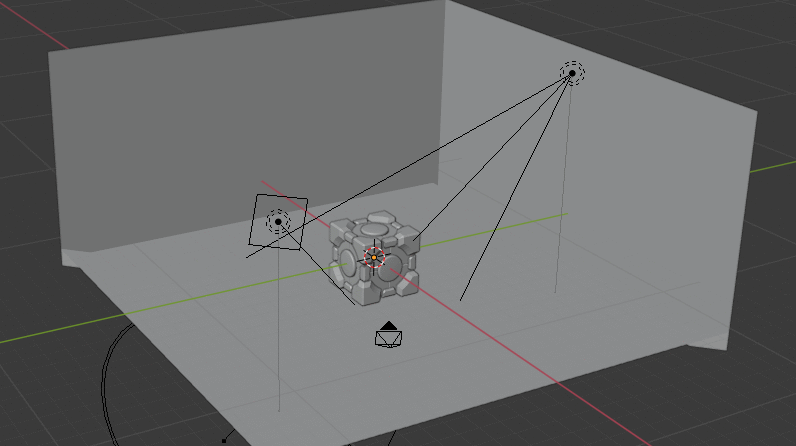
The main light source is the spotlight aimed at the cube. There's also a (relatively weak) area light to provide some soft directional light. The back walls of the room have a trench running along them, and the faces on the bottom have a blue emission shader applied to them. The floor is slightly reflective, as you can see in the final render.
Rendering was done using Cycles. For the final render, I used 2304 samples at 4K resolution, which took about 50 minutes using my GTX 1070.
Now I finally have my very own Companion Cube. It hasn't threatened to stab me. Yet.