In this post about the very basics of Microsoft Azure, I'll show how to implement Azure Active Directory (AAD) authentication in an ASP.NET Core 2 MVC application. I assume you've got an existing AAD and MVC application for this, which we'll tie together in this post.
Creating an App registration
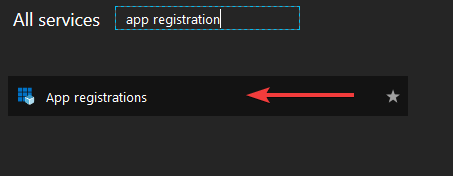
The first thing we'll need is an App registration in our Azure AD. To create one, head over to the App registration service:
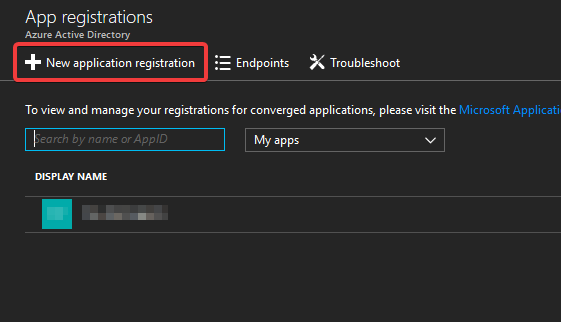
You'll be taken to an overview of current App registrations in your AAD. To add a new one, select "New application registration":
The blade for creating a new App registration will open:
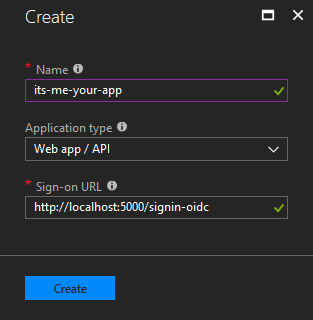
We'll give the registration a name, and make sure "Web app / API" is selected, as we're registering an MVC application. Finally, we'll provide a sign-on URL. We'll use a localhost address for now, for development purposes, but this will be changed later to the URL of our app in Azure.
Hit "create" to create the new App registration.
Configuring the App registration
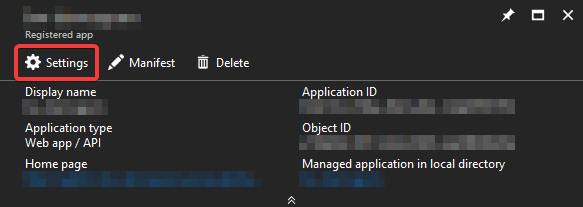
After the App registration has been created, open it and navigate to its settings:
From there, open the "Reply URLs" blade:
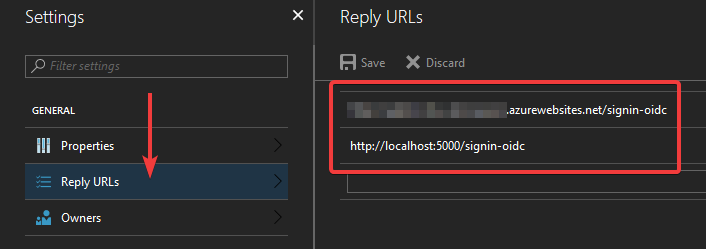
This configures which URLs the AAD is allowed to redirect to when a user signs in using this particular App registration. For development purposes, make sure localhost is registered here.
Configuring the MVC application
With the App registration in place, we can start configuring our MVC application. We'll first need to add some stuff to the appsettings.json file:
{
    "AzureAd": {
        "Instance": "https://login.microsoftonline.com/",
        "Domain": "your-domain.onmicrosoft.com",
        "TenantId": "00000000-0000-0000-0000-000000000000",
        "ClientId": "00000000-0000-0000-0000-000000000000",
        "CallbackPath": "/signin-oidc",
        "ClientSecret": "XXXXXXXXXXXXXXX"
    }
}
A couple of these values will be specific to your App. Here's how to find the information to put there:
Domain
The domain can be found in the overview page of your Azure AD:
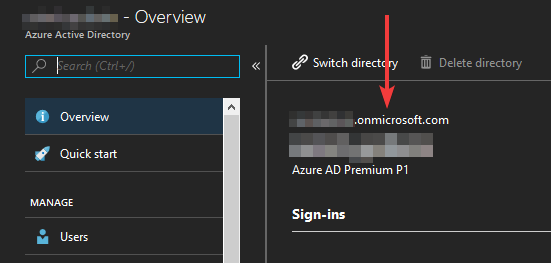
It's the "your-company.onmicrosoft.com" part.
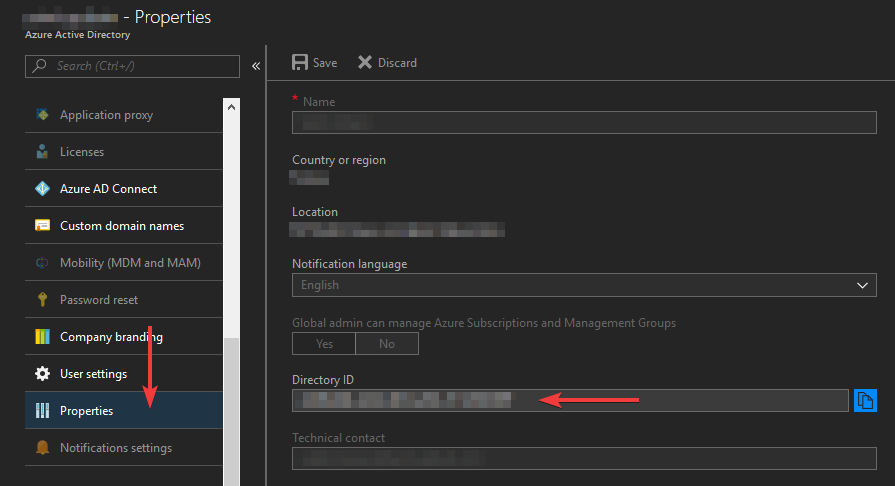
TenantId
This one can be found by navigating to the properties page of your Azure AD, where it's listed under "Directory ID":
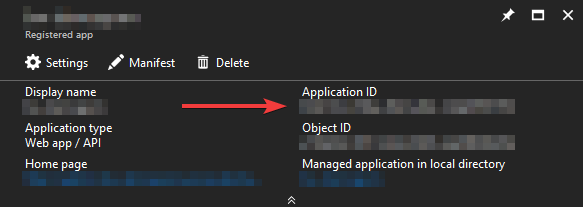
ClientId
This is the ID of the App registration we've created in the first step. You can find it by opening the App registration:
ClientSecret
This is also a property of your App registration. When you open its settings, open the "keys" blade next:
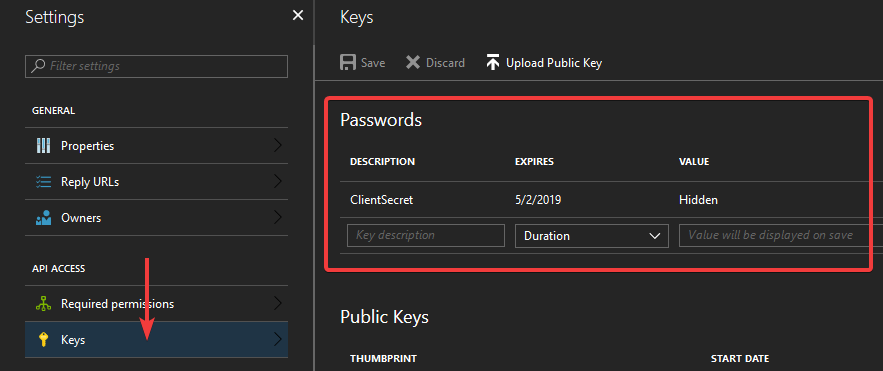
There's two types of keys: passwords and public keys. We'll be using a password. To create a new password, give it a description and an expiration option. After that, hit "save". Azure will generate the actual password for you, and display it after you click "save". The password will only be displayed once, so make sure to copy it immediately, as this is the value for our ClientSecret configuration option. After you navigate away from this page, you can never view any of the previously generated passwords again.
Coding the MVC application
With all of this boring clicking around screens out of the way, we can finally start to write some code. We'll be using OpenID as our authentication scheme, and we'll use a few helper classes that will configure this stuff for us the way Azure AD likes it. They are:
AzureAdOptions.cs
namespace Microsoft.AspNetCore.Authentication
{
    using System;
    using System.Threading.Tasks;

    using Microsoft.AspNetCore.Authentication.OpenIdConnect;

    public class AzureAdOptions
    {
        public string ClientId { get; set; }

        public string ClientSecret { get; set; }

        public string Instance { get; set; }

        public string Domain { get; set; }

        public string TenantId { get; set; }

        public string CallbackPath { get; set; }

        public Func<AuthorizationCodeReceivedContext, Task> OnAuthorizationCodeReceived { get; set; }

        public Func<AuthenticationFailedContext, Task> OnAuthenticationFailed { get; set; }
    }
}
AzureAdAuthenticationBuilderExtensions.cs
namespace Microsoft.AspNetCore.Authentication
{
    using System;

    using Microsoft.AspNetCore.Authentication.OpenIdConnect;
    using Microsoft.Extensions.DependencyInjection;
    using Microsoft.Extensions.Options;
    using Microsoft.IdentityModel.Protocols.OpenIdConnect;

    public static class AzureAdAuthenticationBuilderExtensions
    {
        public static AuthenticationBuilder AddAzureAd(this AuthenticationBuilder builder)
            => builder.AddAzureAd(_ => { });

        public static AuthenticationBuilder AddAzureAd(this AuthenticationBuilder builder, Action<AzureAdOptions> configureOptions)
        {
            builder.Services.Configure(configureOptions);
            builder.Services.AddSingleton<IConfigureOptions<OpenIdConnectOptions>, ConfigureAzureOptions>();
            builder.AddOpenIdConnect();
            return builder;
        }

        private class ConfigureAzureOptions : IConfigureNamedOptions<OpenIdConnectOptions>
        {
            private readonly AzureAdOptions _azureOptions;

            public ConfigureAzureOptions(IOptions<AzureAdOptions> azureOptions)
            {
                _azureOptions = azureOptions.Value;
            }

            public void Configure(string name, OpenIdConnectOptions options)
            {
                options.ClientId = _azureOptions.ClientId;
                options.ClientSecret = _azureOptions.ClientSecret;
                options.Authority = $"{_azureOptions.Instance}{_azureOptions.TenantId}";
                options.UseTokenLifetime = true;
                options.CallbackPath = _azureOptions.CallbackPath;
                options.RequireHttpsMetadata = false;
                options.ResponseType = OpenIdConnectResponseType.CodeIdToken;
                options.Events = new OpenIdConnectEvents
                {
                    OnAuthorizationCodeReceived = _azureOptions.OnAuthorizationCodeReceived,
                    OnAuthenticationFailed = _azureOptions.OnAuthenticationFailed
                };
            }

            public void Configure(OpenIdConnectOptions options)
            {
                Configure(Options.DefaultName, options);
            }
        }
    }
}
Right. With those two in place, we can configure our Startup.cs class. Here's the code we need to set up authentication:
namespace EpicMVCApp
{
    using System;
    using System.Linq;
    using System.Security.Claims;
    using System.Threading.Tasks;

    using Microsoft.AspNetCore.Authentication;
    using Microsoft.AspNetCore.Authentication.Cookies;
    using Microsoft.AspNetCore.Authentication.OpenIdConnect;
    using Microsoft.AspNetCore.Builder;
    using Microsoft.AspNetCore.Hosting;
    using Microsoft.Extensions.Configuration;
    using Microsoft.Extensions.DependencyInjection;

    using Newtonsoft.Json;

    public class Startup
    {
        public Startup(IConfiguration configuration)
        {
            Configuration = configuration;
        }

        public IConfiguration Configuration { get; }

        public IServiceProvider ConfigureServices(IServiceCollection services)
        {
            services.AddAuthentication(options =>
            {
                options.DefaultScheme = CookieAuthenticationDefaults.AuthenticationScheme;
                options.DefaultChallengeScheme = OpenIdConnectDefaults.AuthenticationScheme;
            })
            .AddAzureAd(options =>
            {
                Configuration.Bind("AzureAd", options);
                options.OnAuthorizationCodeReceived = OnAuthorizationCodeReceived;
                options.OnAuthenticationFailed = OnAuthenticationFailed;
            })
            .AddCookie();

            services.AddMvc();

            return services.BuildServiceProvider();
        }

        public void Configure(IApplicationBuilder app, IHostingEnvironment env, IServiceProvider serviceProvider)
        {
            app.UseAuthentication();

            // more stuff
        }

        protected async Task OnAuthorizationCodeReceived(AuthorizationCodeReceivedContext context)
        {
            // received an authorization token!
            // do something with it here (optional)
        }

        protected async Task OnAuthenticationFailed(AuthenticationFailedContext context)
        {
            // authentication has failed!
            // do something here (optional)
        }
    }
}
And that's it! We're done!
Any controller (or action) annotated with an [Authorize] attribute will now redirect to login.microsoftonline.com, where we can sign in with our AAD account. Note that even though we're using Microsoft's generic login page, only users in our AAD can actually sign in to our application. We could expand this, and make the whole thing multi-tenant, but that's one for another time.
Although not necessary, we can add a simple controller to handle signing in and out:
namespace EpicMVCApp.Controllers
{
    using System.Threading.Tasks;

    using Microsoft.AspNetCore.Authorization;
    using Microsoft.AspNetCore.Mvc;
    using Microsoft.AspNetCore.Authentication;

    [Authorize]
    public class AuthenticationController : Controller
    {
        public IActionResult SignIn()
        {
            if (User.Identity.IsAuthenticated)
            {
                return RedirectToAction("Index", "Home");
            }
            return View();
        }

        public async Task<IActionResult> SignOut()
        {
            await HttpContext.SignOutAsync();
            return RedirectToAction("Index", "Home");
        }
    }
}
The "SignIn" action is just a dummy action designed to trigger the signin process. The "SignOut" action does actually perform a whole single line of code. The main purpose of this controller is just to have some nice URLs to direct our users to for signing in and out. We won't actually have a signin page in our application, because we're using Microsoft's login page for that.