In this post about the very basics of Microsoft Azure, I’ll show how to upload and download files from a Blob Storage account using an ASP.NET MVC Core 2 application. I assume you have an existing MVC application to use.
Creating a Storage Account
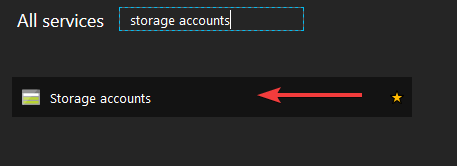
The first thing we’ll need, not just for Blob Storage, but for all sorts of storage-related things in Azure, is a Storage Account. To create one, go to the Storage Account service:

From there, select “add” to start creating a new Storage Account:

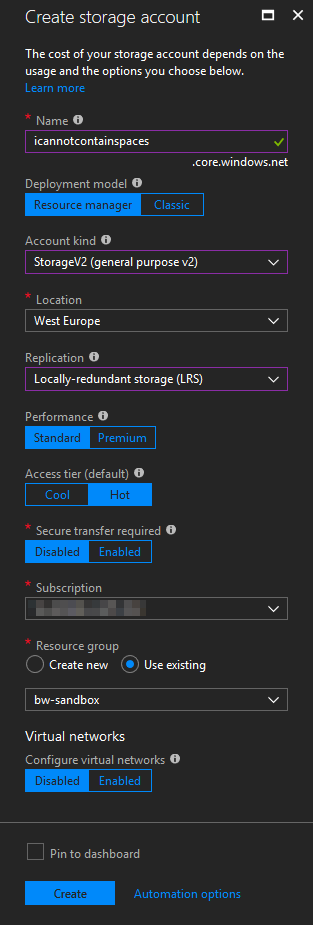
The blade for creating a new Storage Account will open:

Lots of options here, though most of them are pretty self-explanatory. Some of the more interesting ones are:
- Account kind: I haven’t found a reason yet not to use the “StorageV2” account type. As far as I can tell, all other options are basically just there for legacy reasons, and V2 is the future.
- Replication: Controls the level of redundancy and availability for the data in the account. More redundancy equals higher cost. For development purposes, LRS is fine.
- Performance: Is essentially a choice between traditional HDDs (standard) and SSDs (premium) for storage.
- Access tier: Is a choice between low storage cost (cool) and low access cost (hot).
When you’re all set, hit “create” to have Azure create the account for you. It’ll take a short while, and Azure will let you know when it’s done.
Coding the MVC application
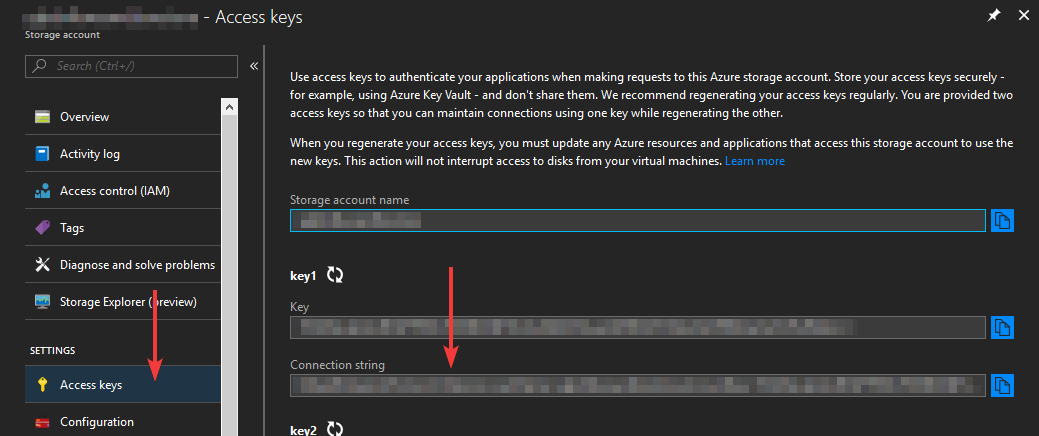
With the storage account ready, we can start talking to it using our MVC application. We’ll be creating a simple controller to upload and download files from the Blob storage in our account. The first thing we’ll need is a connection string. You can find it in the “Access keys” section of your new Storage Account:

Place this in the appsettings.json file, in the ConnectionStrings section:
{
    "ConnectionStrings": {
       "MyAzureStorage": "DefaultEndpointsProtocol=https;AccountName=XXXXXXXXXXXXXXX;AccountKey=XXXXXXXXXXXXXXX;EndpointSuffix=core.windows.net"
    }
}
We’ll then create a simple controller for uploading and downloading files:
namespace EpicMVCApp.Controllers
{
    using System;
    using System.IO;
    using System.Linq;
    using System.Threading.Tasks;

    using Microsoft.AspNetCore.Http;
    using Microsoft.AspNetCore.Mvc;
    using Microsoft.Extensions.Configuration;
    using Microsoft.WindowsAzure.Storage;
    using Microsoft.WindowsAzure.Storage.Blob;

    public class FileController : Controller
    {
        private readonly IConfiguration _configuration;

        public FileController(IConfiguration configuration)
        {
            _configuration = configuration ?? throw new ArgumentNullException(nameof(configuration));
        }

        [HttpGet]
        public IActionResult Upload()
        {
            return View();
        }

        [HttpPost]
        public async Task<IActionResult> Upload(IFormFile file)
        {
            var container = GetContainer();
            await container.CreateIfNotExistsAsync();
            var block = container.GetBlockBlobReference(file.FileName);

            using (var fs = file.OpenReadStream())
            {
                await block.UploadFromStreamAsync(fs);
            }

            return RedirectToAction("Upload");
        }

        [HttpGet]
        public async Task<IActionResult> Download(string fileName)
        {
            var container = GetContainer();
            var block = container.GetBlockBlobReference(fileName);

            return File(
                await block.OpenReadAsync(),
                "application/octet-stream",
                fileName);
        }

        protected CloudBlobContainer GetContainer()
        {
            var storageAccount = CloudStorageAccount.Parse(_configuration.GetConnectionString("MyAzureStorage"));
            var blobClient = storageAccount.CreateCloudBlobClient();

            return blobClient.GetContainerReference("my-file-container");
        }
    }
}
The (partial) view behind it contains a simple form:
<h2>Upload file</h2>

@using (Html.BeginForm(FormMethod.Post, new { enctype = "multipart/form-data" }))
{
    <p>Upload a new file:</p>
    <input type="file" name="file" />
    <input type="submit" value="Upload!" />
}
Obviously this is just a toy example, but it’s a good way of showing how easy this stuff is. With just a few lines of code, we’re uploading and downloading files that are in the cloud…