In this post about the very basics of Microsoft Azure, I’ll show how to use Cosmos DB to store unstructured documents in the cloud. I’ll also show how to talk to this database from an MVC Core 2 application.
I’m assuming you’ve already got an MVC app to work with.
Creating a Cosmos DB
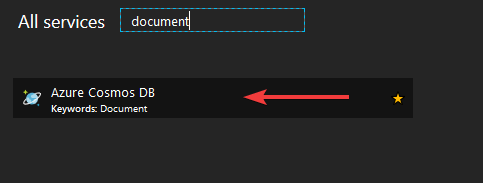
First things first: let’s create a Cosmos DB. Open the Cosmos DB service:
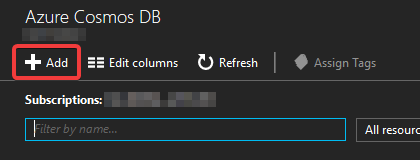
From there, click “Add” to start creating a new Cosmos DB:
The blade for creating a new Cosmos DB will open:
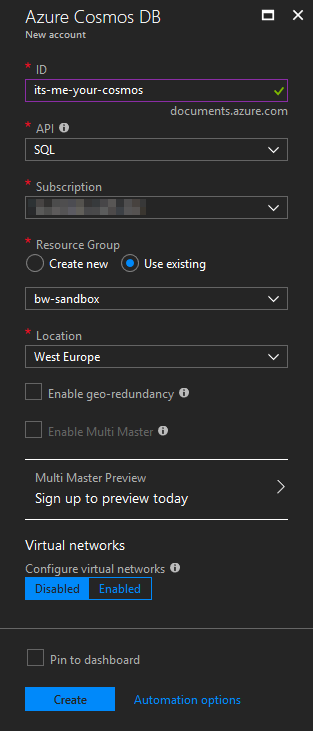
We can chose between a number of different API options. One of them is the DocumentDB SQL API, which is compatible with the old DocumentDB API before it was deprecated in favor of Cosmos DB. We’ll use this API.
We won’t be using geo-redundancy, since we’re just a humble development hobby project.
Once we’re all set, hit “Create” to provision the new Cosmos DB instance.
Creating a database
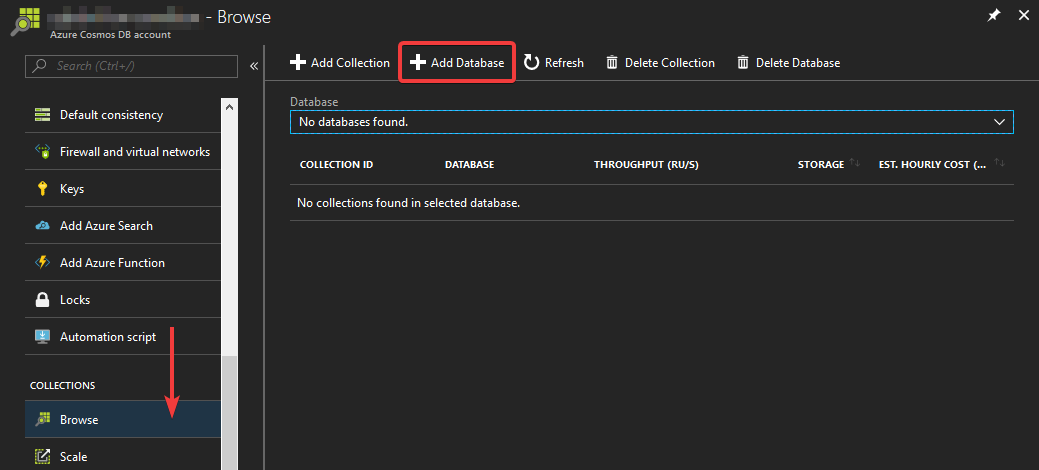
Our new Cosmos DB service can contain multiple database. To create the first one, open the Cosmos DB overview, and go to the “Browse collections” blade. From there, hit “Add database” to create a new database:
The blade for creating a new database will open:
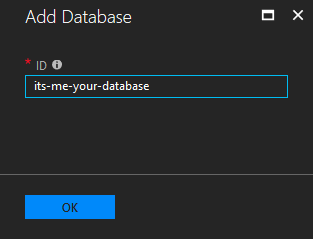
There’s not a whole lot going on here. We simply give our database a name and hit “OK” to create it.
Creating a new collection
Each Cosmos DB database can contain multiple collections. This is where the actual documents are located. To create a new collection, open the Cosmos DB overview, and go to the “Browse collections” blade. From there, hit “Add collection” to create a new collection:
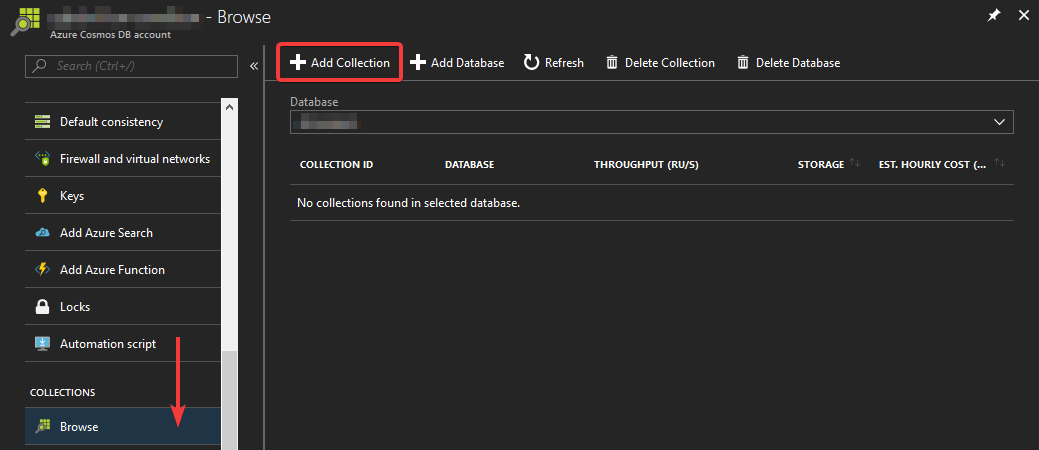
The blade for adding a new collection will open:
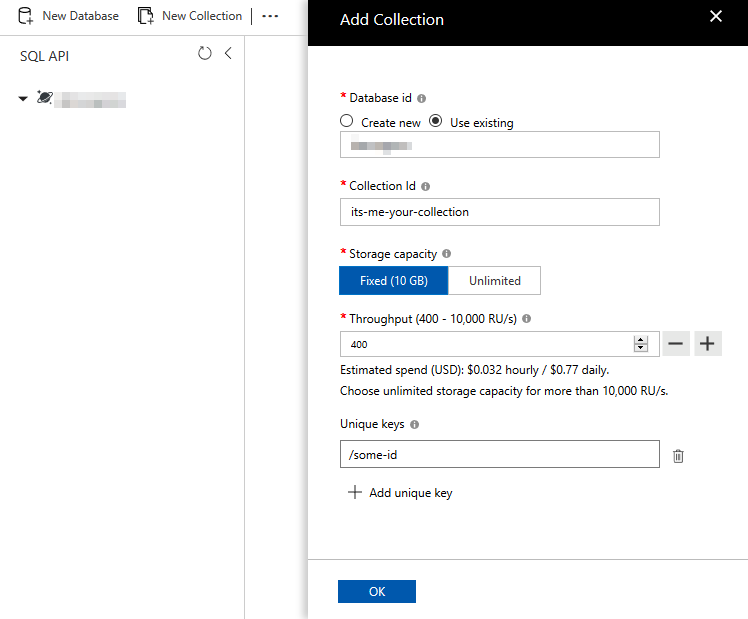
We can optionally create a new database from here, but since we’ve already got one we’ll just select it instead.
Storage capacity options aren’t exactly fine-grained: we can either choose 10GB or unlimited. When selected unlimited, you’ll have to provide a partition key that will be used to partition you data across multiple servers.
Since we won’t be using a whole lot of data in our little test project, we’ll just go for 10GB. We’ll also set the throughput capacity to the smallest amount possible, in order to minimize cost.
Once we’re all set, we hit “OK” to create the new collection.
Integrating with Cosmos DB
With the database created, we can start talking to it from our MVC application. The first thing we’ll need is (you’ve guessed it) some access keys. From the overview of the Cosmos DB service, open the “keys” blade:
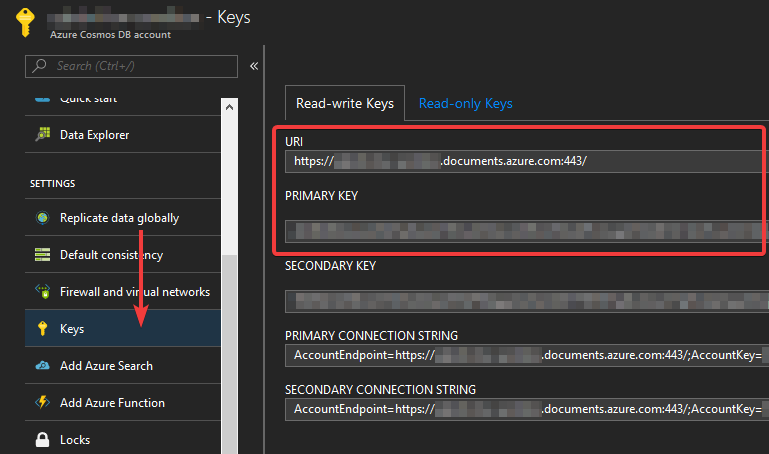
We have a choice between read-write keys and read-only keys. Since we’ll be writing data as well as reading it, we’ll pick the former. We’ll copy the URI and access key separately, and add them to our appsettings.json file:
{
    "CosmosDb": {
        "ServiceEndpoint": "https://its-me-your-cosmos.documents.azure.com:443/",
        "AuthKey": "XXXXXXXXXXXXXXX"
    }
}
As a working example, we’ll be storing comments that users of our site can place under photos. We’ll model a comment as follows:
namespace EpicMVCApp.Models
{
    using System;

    using Newtonsoft.Json;

    public class Comment
    {
        [JsonProperty(PropertyName = "id")]
        public Guid Id { get; set; }

        [JsonProperty(PropertyName = "tenantId")]
        public Guid TenantId { get; set; }

        [JsonProperty(PropertyName = "photoId")]
        public Guid PhotoId { get; set; }

        [JsonProperty(PropertyName = "userId")]
        public Guid UserId { get; set; }

        [JsonProperty(PropertyName = "userName")]
        public string UserName { get; set; }

        [JsonProperty(PropertyName = "creationDate")]
        public DateTime CreationDate { get; set; }

        [JsonProperty(PropertyName = "commentText")]
        public string CommentText { get; set; }
    }
}
We’ll then create a simple service to store these comments in Cosmos DB:
namespace EpicMVCApp.Services
{
    using System;
    using System.Collections.Generic;
    using System.Linq;
    using System.Threading.Tasks;

    using EpicMVCApp.Models;

    using Microsoft.Azure.Documents.Client;
    using Microsoft.Azure.Documents.Linq;
    using Microsoft.Extensions.Configuration;

    public class CosmosDbService
    {
        private readonly IConfiguration _configuration;
        private readonly DocumentClient _client;

        public CosmosDbService(IConfiguration configuration)
        {
            _configuration = configuration ?? throw new ArgumentNullException(nameof(configuration));

            var endpoint = configuration.GetValue<string>("CosmosDb:ServiceEndpoint");
            var key = configuration.GetValue<string>("CosmosDb:AuthKey");

            _client = new DocumentClient(new Uri(endpoint), key);
        }

        public async Task InsertComment(Comment comment)
        {
            var uri = UriFactory.CreateDocumentCollectionUri("its-me-your-database", "comments");
            await _client.CreateDocumentAsync(uri, comment);
        }
    }
}
You know, I’ve often found these Azure services to be really easily accessible, with a fairly minimal API, but this is a pretty extreme example. There’s really not much to write about here because it’s so simple.
We register this class as a singleton in our Startup.cs:
namespace EpicMVCApp
{
    // usings omitted

    public class Startup
    {
        public IServiceProvider ConfigureServices(IServiceCollection services)
        {
            services.AddSingleton<CosmosDbService>();

            // omitted

            return services.BuildServiceProvider();
        }

        // rest of the class omitted
    }
}
Exploring the data
After inserting some test data, we can explore the results through the Azure portal. From the Cosmos DB overview page, open the “Data explorer” blade:
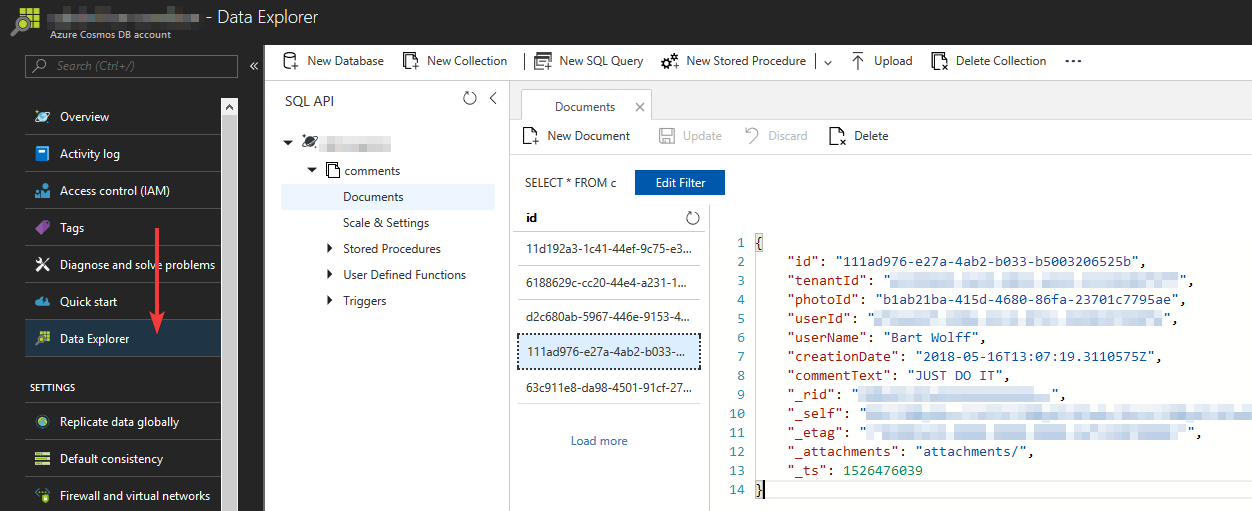
From here, you can browse through the databases, collections, and the raw JSON documents inside them.
Retrieving the data
Of course, we’ll also want to retrieve the data from Cosmos DB from our MVC app. For this, we’ll expand the service class we’ve made earlier with an additional method:
namespace EpicMVCApp.Services
{
    // usings omitted

    public class CosmosDbService
    {
        // omitted

        public async Task<IEnumerable<Comment>> GetComments(Guid tenantId, Guid photoId)
        {
            var uri = UriFactory.CreateDocumentCollectionUri("its-me-your-database", "comments");
            var query = _client.CreateDocumentQuery<Comment>(uri)
                .Where(x => x.TenantId == tenantId && x.PhotoId == photoId)
                .AsDocumentQuery();

            var comments = new List<Comment>();
            while (query.HasMoreResults)
            {
                comments.AddRange(await query.ExecuteNextAsync<Comment>());
            }

            return comments;
        }
    }
}
This will fetch all of the comments for a particular photo. The CreateDocumentQuery function returns an IOrderedQueryable, which you can then filter and sort using LINQ. This makes querying data from Cosmos DB fairly straightforward.